Studio Setup: Creating a Professional Recording Environment
Transform any space into a professional recording studio. Learn acoustic treatment, lighting design, background styling, and workflow optimization for consistent, high-quality content creation.
Executive Summary
Your recording environment is as critical as your equipment - often more so. A $3,000 camera in a poorly lit, echoey room produces worse results than a $500 camera in a well-designed space. This comprehensive guide teaches you to transform any room into a professional recording studio, whether you’re working with a dedicated office, a bedroom corner, or a converted closet. We’ll cover acoustic treatment to eliminate audio problems, lighting design that flatters and professionalizes, background styling that reinforces your brand, and workflow optimization that makes creation frictionless. By the end, you’ll have a complete blueprint for building a studio that scales with your growth - from amateur setup to broadcast-ready production space - without requiring expensive construction or dedicated real estate.
First Principles: Environment as Production Value
Before diving into specifics, understand why environment matters:
The Signal-to-Noise Principle
Your content is the signal; everything else is noise. Poor environments introduce visual and auditory noise that distracts from your message. Professional environments eliminate noise, amplifying signal clarity.
The Consistency Imperative
Viewers subscribe for predictable quality. A studio provides consistent lighting, sound, and framing - ensuring every video meets the standard your audience expects. Inconsistent environments create variable quality that erodes trust.
The Efficiency Multiplier
A well-designed studio reduces setup time, enables faster workflows, and removes friction from creation. When your space is always ready to record, you record more. When setup takes 30 minutes, you find excuses not to create.
The Professional Perception
Sponsors, collaborators, and viewers judge professionalism partly by environment. A thoughtfully designed studio signals commitment, competence, and credibility before you speak a word.
Space Selection: Finding Your Recording Location
Option 1: The Dedicated Room (Best)
Advantages:
- Permanent setup (always ready to record)
- Maximum acoustic treatment possible
- Complete control over environment
- Separation from living space (psychological and practical)
Requirements:
- Minimum 8x10 feet (larger is better for lighting flexibility)
- Ability to control light (windows with blackout options)
- Door that closes (sound isolation)
- Climate control (consistent temperature for equipment and you)
Ideal Candidates:
- Spare bedroom
- Home office
- Basement room
- Garage conversion
Option 2: The Multi-Purpose Space (Common)
Advantages:
- No dedicated room required
- Can use existing space efficiently
- Lower barrier to entry
Challenges:
- Setup/breakdown time for each session
- Limited permanent installation (acoustic treatment, lighting)
- Visual/audio compromises
- Potential interruptions
Optimization Strategies:
- Portable lighting kit (quick setup)
- Collapsible backdrop or green screen
- Quick-release mounts for cameras/mics
- Storage system for equipment (always packed and ready)
Option 3: The Compact Setup (Minimal)
Advantages:
- Works in any living situation
- Minimal space requirements
- Low cost
- Highly portable
Challenges:
- Tight framing limits creativity
- Acoustic treatment nearly impossible
- Background options limited
- Lighting challenges in small spaces
Best For:
- Talking head content
- Voiceover work
- Temporary setups while building to better space
Acoustic Treatment: The Foundation of Professional Audio
Bad acoustics kill content more than bad microphones. Echo, reverb, and room noise make even expensive mics sound amateur.
Understanding Room Acoustics
The Problem: Sound bounces off hard surfaces (walls, floors, ceilings) creating reflections. These reflections:
- Create echo (distracting, reduces clarity)
- Cause comb filtering (uneven frequency response)
- Increase noise floor (room becomes part of the recording)
The Goal: Control reflections to create “dry” audio - clean, clear, without room interference.
Acoustic Treatment Priorities
Priority 1: Reflection Points
Sound reflects predictably from the speaker to the microphone. Treat these “first reflection points” for maximum impact.
Identifying Reflection Points:
- Sit in your recording position
- Have someone move a mirror along the side walls
- Mark where you can see the microphone in the mirror
- These are your side reflection points
- Repeat for ceiling (mirror on broom handle)
Treatment:
- Acoustic panels at these points
- Minimum 2’x2’ per point
- 2-4 inches thick for effective absorption
Priority 2: Behind the Speaker
Sound bouncing from behind you reaches the mic after slight delay, creating phase issues.
Treatment:
- Large panel or absorption directly behind recording position
- Bookshelf with books (irregular surface diffuses sound)
- Heavy curtains or fabric wall hangings
Priority 3: Corners and Ceiling
Bass frequencies accumulate in corners. High frequencies reflect from ceiling.
Treatment:
- Bass traps in corners (floor-to-ceiling if possible)
- Ceiling clouds or panels above recording area
- Minimum 12-inch triangular bass traps
DIY vs. Professional Treatment
Professional Panels:
- Acoustic panels: $50-150 each (2’x4’)
- Bass traps: $80-200 each
- Ceiling clouds: $150-300 each
- Total for small room: $500-1,500
DIY Options:
- Rockwool/mineral wool in wooden frames with fabric
- Owens Corning 703 or 705 insulation
- Cost: $20-40 per panel (materials only)
- Effectiveness: 80-90% of professional panels
Budget Alternatives:
- Heavy blankets/comforters on walls
- Bookshelves filled with books
- Mattresses or cushions strategically placed
- Open closets with clothes
- Hanging clothes or fabric
Effectiveness ranking:
- Professional acoustic treatment (best)
- DIY mineral wool panels (excellent value)
- Heavy blankets/fabric (acceptable for starting)
- Bookshelves and irregular surfaces (partial solution)
Sound Isolation vs. Acoustic Treatment
Important Distinction:
- Acoustic treatment: Controls sound within the room (prevents echo)
- Sound isolation: Prevents sound from entering/leaving the room (soundproofing)
Treatment is essential; isolation is optional.
Basic Isolation Strategies:
- Record during quiet hours (early morning, late night)
- Close doors and windows
- Turn off HVAC, fans, appliances
- Use noise reduction in post (minimal impact, last resort)
Advanced Isolation:
- Weatherstripping around doors
- Thick curtains over windows
- Door sweeps to seal gaps
- Acoustic sealant around outlets/fixtures
- Mass-loaded vinyl on walls (expensive, construction-level)
Room Mode Analysis (Advanced)
Every room has “modes” - frequencies that resonate and build up:
Simple Test:
- Play a sine wave sweep (20Hz-20kHz) through speakers
- Listen for frequencies that get significantly louder
- These are your room modes
Addressing Room Modes:
- Bass traps in corners (addresses low-frequency modes)
- Variable panel placement
- EQ compensation (use sparingly)
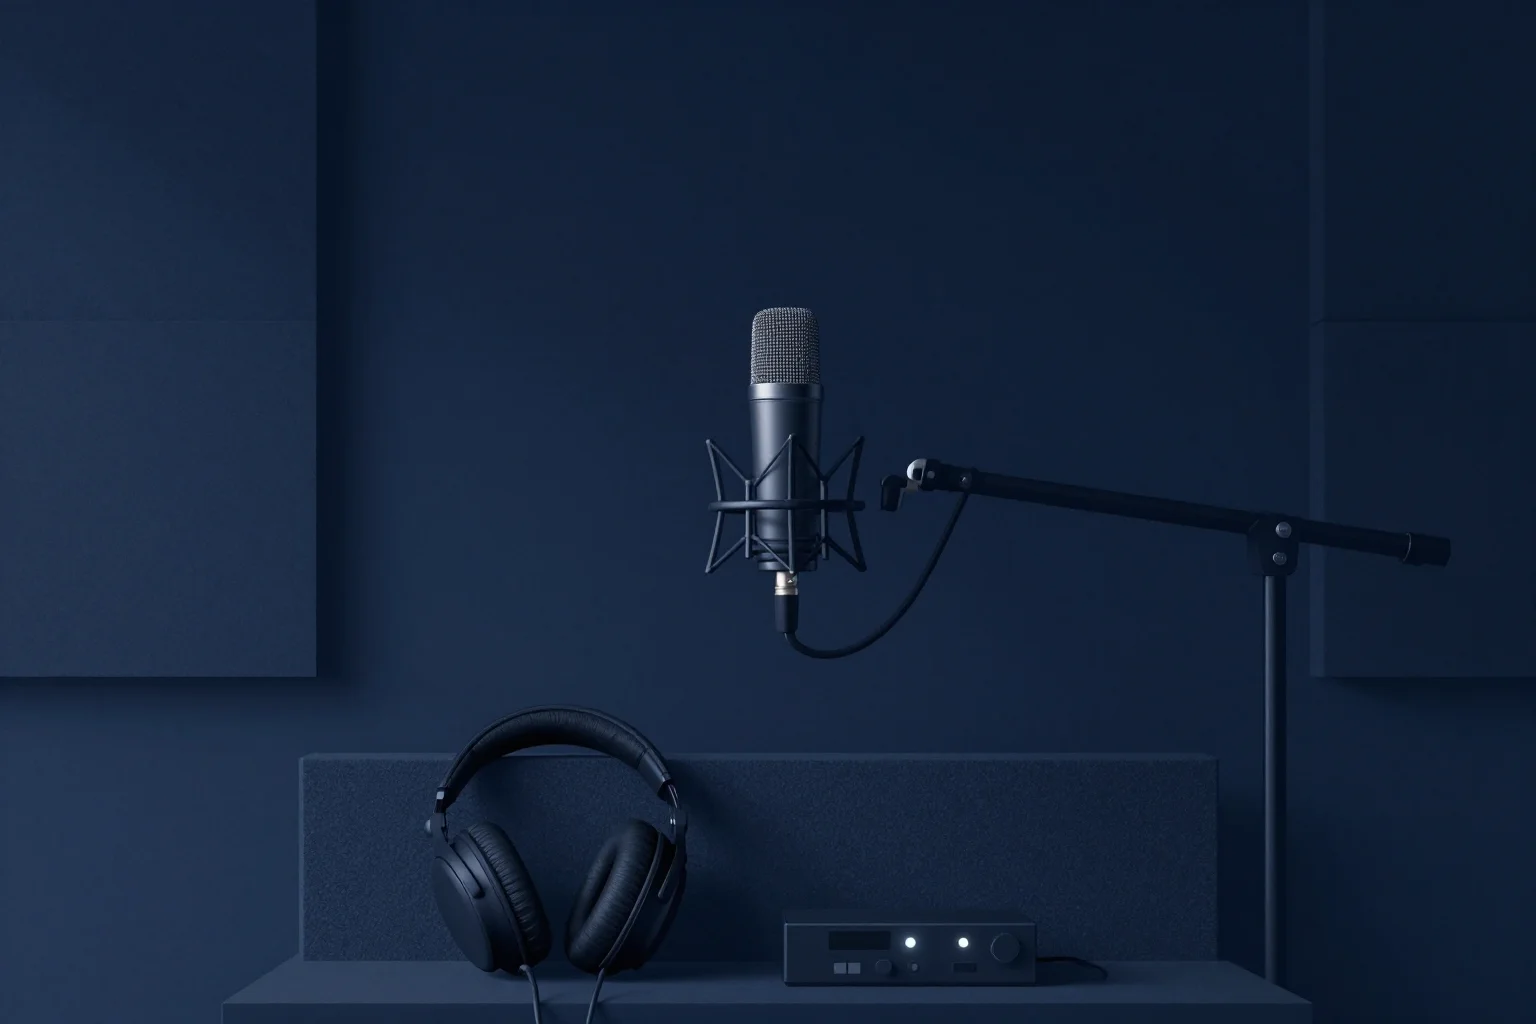
Lighting Design: Creating Flattering, Professional Illumination
Lighting is cinematography. It determines mood, quality, and professional perception more than any camera setting.
The Three-Point Lighting System
The Foundation of Professional Lighting:
Key Light (Primary):
- Position: 45° to subject’s side, 45° above eye level
- Purpose: Main illumination, defines face/shape
- Intensity: 100% (baseline)
- Quality: Soft (diffused) for flattering skin, hard for dramatic effect
Fill Light (Secondary):
- Position: Opposite side of key, lower
- Purpose: Fill shadows created by key light
- Intensity: 25-50% of key (creates dimension)
- Quality: Always soft (never compete with key)
Back Light (Accent):
- Position: Behind subject, above head level
- Purpose: Separate subject from background, add depth
- Intensity: 50-75% of key
- Quality: Can be hard or soft depending on desired effect
Practical Setup: For most creator content, modify this to:
- Key: Large soft source (softbox or large LED)
- Fill: Reflectors or secondary light at lower power
- Practical: Room lights for background/context
Lighting Quality: Soft vs. Hard
Soft Light:
- Large source relative to subject
- Diffused through material or bounced
- Flattering, reduces skin imperfections
- Creates gradual shadows
- Best for: Talking head, beauty, most creator content
Creating Soft Light:
- Large softboxes (24”+ for single person)
- Diffusion panels in front of lights
- Bouncing light off walls/ceilings
- Light tents or umbrellas
Hard Light:
- Small, direct source
- Sharp shadows, high contrast
- Dramatic, defined
- Shows texture and detail
- Best for: Product shots, artistic content, specific moods
Color Temperature and White Balance
Understanding Kelvin:
- 2700K: Warm/incandescent (cozy, evening feel)
- 3200K: Tungsten (standard indoor)
- 4100K: Cool white (office fluorescent)
- 5600K: Daylight (neutral, standard for video)
- 6500K: Overcast daylight (cool, clinical)
Creator Standard:
- Set all lights to 5600K (daylight balanced)
- Set camera white balance to match (5600K or custom)
- Consistency is more important than specific temperature
Mixed Lighting Challenges:
- Avoid mixing color temperatures (warm tungsten + cool daylight = color cast)
- If mixing is unavoidable, prioritize dominant source and correct others with gels
- Post-production color correction is possible but time-consuming
Lighting Equipment Options by Budget
Tier 1: Natural Light Mastery ($0-50)
- Primary source: Large window
- Diffuser: White sheet or diffusion fabric ($15-30)
- Reflector: White foam board ($5-10)
- Time: Shoot during golden hour or overcast days
Advantages:
- Beautiful, free, always changing for variety
- Large source = naturally soft
- Provides dimension and mood
Challenges:
- Weather dependent
- Time-of-day dependent
- Less control than artificial
- Can be inconsistent
Tier 2: Basic Artificial Kit ($100-300)
- Key: LED panel 18”+ or softbox ($80-150)
- Fill: Reflector or secondary small LED ($20-50)
- Back: Practical light or LED accent ($30-80)
- Stands: Light stands ($40-80 for set)
Recommended Kits:
- Neewer 2x 18” LED panels ($120)
- Emart 3-point softbox kit ($89)
- Godox LEDP260C with softbox ($120)
Tier 3: Professional Creator Kit ($400-1,000)
- Key: Aputure Amaran 200x or Godox SL60W ($200-350)
- Fill: Secondary light or quality reflector ($50-150)
- Back: RGB panel for color accents ($100-200)
- Modifiers: Large softbox, grid, flags ($150-300)
- Stands: Heavy-duty, air-cushioned ($100-200)
Recommended Setup:
- Aputure Amaran 200x + Light Dome II ($550)
- Aputure MC RGB for accent ($99)
- Reflector and flags ($100)
- Stands ($150)
- Total: $900
Tier 4: Broadcast Studio ($1,500-5,000+)
- Multiple Aputure 300d II or equivalent ($1,500-3,000)
- Professional modifiers (domes, grids, snoots)
- Overhead grid or rigging system
- DMX control for complex scenes
- Backdrops and set design
- Professional light board/controls
Background Design: Visual Identity in Space
Your background is part of your brand. It should be intentional, not accidental.
Background Types:
1. The Branded Office/Workspace:
- Bookshelves with curated items
- Plants for life and color
- Personal items showing personality
- Professional but approachable
Best for: Business, education, professional services
Key Elements:
- Books relevant to your niche
- 1-2 plants (easy maintenance: pothos, snake plant)
- Personal touches (photos, awards, memorabilia)
- Clean, organized but lived-in feel
2. The Minimal/Clean Background:
- Solid color or subtle gradient
- No distractions
- Focus entirely on speaker
- Professional, modern
Best for: Corporate content, serious topics, when you want maximum attention
Key Elements:
- Solid color wall or seamless paper
- Neutral tones (gray, beige, soft blue)
- Subtle texture (fabric, subtle pattern)
- Negative space is the design
3. The Themed/Contextual Background:
- Environment relevant to content
- Workshop, studio, kitchen, etc.
- Shows authenticity and expertise
- Immersive and engaging
Best for: How-to content, demonstrations, lifestyle
Key Elements:
- Functional space relevant to topic
- Tools/equipment visible
- Authentic environment (real workshop, real kitchen)
- Organized chaos (active but not messy)
4. The Dynamic/Virtual Background:
- Green screen with digital backgrounds
- Ability to change environment per video
- High production value potential
- Technical complexity required
Best for: Gaming, educational content with graphics, creative presentations
Key Elements:
- Quality green screen (wrinkle-free, well-lit)
- Even lighting (no shadows on screen)
- Distance from screen (8-10 feet minimum)
- Good keying software/editing
Background Design Principles
The Rule of Thirds:
- Position yourself in left or right third, not center
- Leave visual space in direction you’re looking
- Background elements support, don’t compete
Depth Creation:
- Minimum 4-6 feet between you and background
- Creates separation and dimension
- Allows background blur (shallow depth of field)
- Prevents flat, mugshot appearance
Color Theory:
- Complement your wardrobe (don’t clash)
- Consider skin tone flattery
- Brand colors subtly incorporated
- Avoid pure white (harsh, clinical) and pure black (absorbs light)
Lighting Integration:
- Background should have its own illumination
- Separate from subject lighting (prevents silhouetting)
- Can use practical lights (lamps, monitors, LEDs) for interest
- Avoid windows behind you (backlighting issues)
Workflow Optimization: Frictionless Creation
A studio should make creation easier, not harder. Design for workflow efficiency.
The Always-Ready Setup
Goal: Walk in, sit down, press record. No setup time means no excuses.
Implementation:
- Camera on permanent mount (tripod or desk arm)
- Microphone always connected and positioned
- Lighting in fixed positions (mark spots with tape)
- Background complete and stable
- Storage for scripts/notes nearby
Benefits:
- Removes friction from creation
- Ensures consistency between videos
- Enables quick recording when inspiration strikes
- Reduces decision fatigue
The Quick-Release System
For multi-purpose spaces, optimize for rapid setup/breakdown:
Components:
- Quick-release plates on cameras
- Collapsible lighting stands
- Pre-marked positions (tape on floor for tripod, light positions)
- Checklist for setup (ensures nothing forgotten)
- Storage cart with all equipment (roll in, roll out)
Setup Time Target:
- Professional studio: 0 minutes (always ready)
- Optimized multi-purpose: 5-10 minutes
- Acceptable compromise: 15-20 minutes
Cable Management and Organization
The Principle: Visible cables look amateur and create trip hazards.
Solutions:
- Cable raceways along walls/floor
- Velcro ties for bundling
- Cable sleeves for behind-desk areas
- Gaffer’s tape for temporary routing
- Labels on cable ends (prevents confusion)
Power Management:
- UPS (battery backup) for critical equipment
- Surge protectors with enough outlets
- Dedicated circuits if possible (prevents interference)
- Cable length management (excess coiled, not tangled)
Monitoring and Confidence
Monitoring Setup:
- External monitor for camera feed (see yourself while recording)
- Headphones for audio monitoring (catch issues immediately)
- Laptop/teleprompter for script reference
- Recording indicators (know when camera is rolling)
Confidence Builders:
- Seeing yourself prevents surprises in editing
- Audio monitoring catches problems immediately
- Script visibility reduces anxiety
- Recording confirmation prevents “did I hit record?” panic
Space Optimization by Content Type
Talking Head/Instructional Content
Requirements:
- Controlled background
- Excellent audio
- Consistent lighting
- Eye-line with camera
Studio Design:
- Chair/desk positioned for comfortable framing
- Background 4-6 feet behind
- Side table for water/notes
- Teleprompter or laptop for scripts
Product Reviews/Demonstrations
Requirements:
- Top-down capability or table setup
- Good close-up lighting
- Clean surface or background
- Multiple angles possible
Studio Design:
- Overhead rig or C-stand for top-down
- Large table or desk (clean surface)
- Multiple camera positions possible
- Product storage nearby
Green Screen/Virtual Production
Requirements:
- Large green screen (wrinkle-free)
- Even, shadow-free lighting on screen
- Distance from screen (8+ feet)
- Good keying in post
Studio Design:
- Retractable or permanent green screen
- Dedicated screen lighting (separate from subject)
- Wide space for freedom of movement
- Marker on floor for consistent positioning
Multi-Person/Interview Content
Requirements:
- Space for multiple subjects
- Lighting that works for all
- Camera positions for multiple angles
- Audio separation/isolation
Studio Design:
- Wide room (12+ feet for two people)
- Multiple lighting zones
- Two-camera minimum setup
- Individual audio capture (lapel mics or boom)
The Evolution Timeline: Scaling Your Studio
Month 0-3: The Starter Studio
- Space: Corner of room or closet
- Audio: Basic treatment (blankets, pillows)
- Lighting: Natural light optimized or basic LED
- Background: Clean wall or simple setup
- Investment: $0-200
Month 3-12: The Growing Studio
- Space: Dedicated corner or small room
- Audio: DIY acoustic panels, better isolation
- Lighting: Three-point artificial setup
- Background: Designed and styled
- Investment: $300-800
Year 1-2: The Serious Studio
- Space: Dedicated room
- Audio: Professional treatment, sound isolation
- Lighting: Professional LED kit with modifiers
- Background: Fully branded environment
- Investment: $1,000-3,000
Year 2+: The Professional Studio
- Space: Custom-designed room or dedicated studio
- Audio: Complete acoustic design, broadcast quality
- Lighting: Multi-light professional rig
- Background: Set design, multiple configurations
- Investment: $5,000-20,000+
Common Studio Setup Mistakes
Mistake 1: Equipment Before Environment
Buying expensive cameras before treating acoustics or designing lighting. A $500 camera in a treated room beats a $3,000 camera in an echoey, poorly lit space.
Solution: Prioritize environment over equipment. Acoustic treatment and lighting design come before camera upgrades.
Mistake 2: The Cluttered Background
Busy, distracting backgrounds that compete for attention. Viewers should focus on you, not your stuff.
Solution: Simplify. Remove everything that doesn’t serve the content or your brand. Curate intentionally.
Mistake 3: The Flat Lighting Trap
Single light source directly in front creates flat, unflattering illumination. No dimension, no professionalism.
Solution: Minimum two-light setup (key + fill) or key + reflector. Create dimension with lighting angles.
Mistake 4: Ignoring Acoustics
Focusing entirely on video while neglecting audio environment. Echo and room noise are retention killers.
Solution: Acoustic treatment is non-negotiable. Even DIY solutions (blankets, pillows) dramatically improve audio.
Mistake 5: Inconsistent Setup**
Breaking down and rebuilding differently each time creates variable quality and wastes time.
Solution: Design for consistency. Mark positions, create checklists, optimize for “always ready” or quick setup.
Checklist: Studio Setup Process
Space Assessment:
- I’ve identified the best available space (quiet, controllable, dedicated if possible)
- I’ve measured room dimensions and noted challenges
- I’ve identified reflection points for acoustic treatment
- I’ve found power sources and considered cable routing
- I’ve tested the space with a test recording (reveals problems)
Acoustic Treatment Plan:
- I’ve identified first reflection points (mirror test)
- I’ve planned treatment for behind recording position
- I’ve considered bass trapping in corners
- I’ve budgeted for materials (DIY or professional)
- I’ve planned installation timeline
Lighting Design:
- I’ve identified key light position and source
- I’ve planned fill light or reflector placement
- I’ve considered accent/back lighting
- I’ve chosen color temperature (5600K recommended)
- I’ve tested lighting with test recording
Background Design:
- I’ve chosen background type (office, minimal, themed, virtual)
- I’ve curated background elements intentionally
- I’ve ensured 4-6 feet depth between subject and background
- I’ve tested background on camera (looks different than in person)
- I’ve incorporated brand elements subtly
Workflow Optimization:
- I’ve designed for “always ready” or quick setup
- I’ve organized cable management
- I’ve set up monitoring (camera feed, audio)
- I’ve created setup/breakdown checklists if needed
- I’ve tested full workflow from walk-in to recording
Ongoing Maintenance:
- I have a weekly cleaning/tidying schedule
- I check and replace acoustic treatment as needed
- I maintain lighting equipment (bulbs, connections)
- I update background elements periodically
- I review and optimize workflow quarterly
Budget Tiers: Studio Investment by Phase
The $0-100 Starter Studio:
- Space optimization: Free (best corner of room)
- Acoustic treatment: Heavy blankets, pillows, closet
- Lighting: Natural light optimization + household lamps
- Background: Clean wall, minimal styling
- Focus: Making current space work
The $300-800 Growing Studio:
- Acoustic panels: DIY mineral wool ($100-200)
- Lighting: Basic LED or softbox kit ($100-300)
- Background: Bookshelf, plants, intentional styling ($100-200)
- Accessories: Cables, storage, organization ($50-100)
- Focus: Solving fundamental problems (echo, lighting)
The $1,000-2,500 Serious Studio:
- Acoustic treatment: Professional panels, bass traps ($400-800)
- Lighting: Professional LED kit with modifiers ($500-900)
- Background: Full design, possible custom elements ($300-600)
- Monitoring: External monitor, teleprompter ($200-400)
- Focus: Professional quality, workflow efficiency
The $3,000-10,000+ Professional Studio:
- Everything above, upgraded and expanded
- Multiple camera positions
- Advanced acoustic treatment (ceiling, comprehensive)
- Professional lighting rig
- Custom set design
- Backup systems and redundancy
- Focus: Broadcast quality, team workflow
Conclusion: Your Space Reflects Your Standards
Your studio is more than a recording location - it’s a statement of your commitment to your craft. A thoughtfully designed space signals to yourself, your audience, and potential partners that you take this seriously.
But remember: the best studio is the one you use. A perfect setup that’s too complicated to maintain becomes a barrier. Start simple, optimize for your workflow, and upgrade as your practice demands.
The environment you create shapes the content you produce. Design intentionally. Build systematically. And never forget that a creator with a $0 setup who publishes consistently beats a creator with a $10,000 studio who never records.
Your studio serves your content. Build it to remove friction, enhance quality, and enable your best work.
Setting up your studio? AutonoLab provides studio design guides, acoustic treatment calculators, lighting setup recommendations, and workflow optimization tools. From space planning to equipment positioning, we help you create a professional recording environment that scales with your growth.